

天地万物都是有名称,一个人很有可能有很多名称,例如明太祖朱元璋,能够应用朱重八来区别。针对bean而言也是一样。文中关键研究,spring中是如何区分每一个bean的。主要是方法,其关键基本原理关键在bean的生命期中去管理方法。
主要是根据下列三种:
- public class User {
- private String name;
- public User(String name) {
- this.name = name;
- }
- public String getName() {
- return name;
- }
- public void setName(String name) {
- this.name = name;
- }
- public void hello() {
- System.out.println("name:" "hello world");
- }
- }
User是做为一个bean,里边界定了一个hello的方式。
- <?xml version="1.0" encoding="UTF-8"?>
- <beans xmlns="http://www.springframework.org/schema/beans"
- xmlns:xsi="http://www.w3.org/2001/XMLSchema-instance"
- xsi:schemaLocation="http://www.springframework.org/schema/beans
- http://www.springframework.org/schema/beans/spring-beans.xsd">
- <bean id="user" class="com.example.demo.beam.User">
- <constructor-arg value="愚公要移山"/>
- </bean>
- </beans>
我还在resource文件目录下边新创建了一个META-INF文件目录用以储放spring.xml文件。这一文档中应用了id来区别不一样的bean。
- public class Main {
- public static void main(String[] args) {
- String xmlPath = "META-INF/spring.xml";
- ApplicationContext applicationContext = new ClassPathXmlApplicationContext(xmlPath);
- //从spring器皿得到
- User user = (User) applicationContext.getBean("user");
- user.hello();
- }
- }
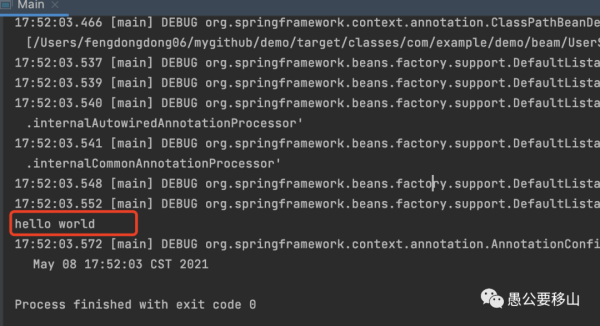
在控制面板就可以见到結果了。照片
申明Bean的注释:
(1)@Component部件,沒有确立的人物角色。
(2)@Service在领域模型层(Service层)应用。
(3)@Repository在数据信息浏览层(dao层)应用。
(4)@Controller在呈现层应用。
他们默认设置沒有立即特定bean的name,因此 bean的name是spring自动生成的。bean的name转化成标准以下:
(1)class的simpleName假如超过一个标识符且第二个标识符是英文大写字母,则simpleName便是bean name,
(2)假如class的simpleName是一个标识符或是第2个标识符是小写字母,则将首写变为小写字母的字符串数组做为bean name,
举例说明 "FooBah"的bean名字变成了"fooBah","X" 变成了 "x","URL" 仍然是"URL"。下边根据案例演试一波:
留意:若不一样的包了有两个名字同样的类,而这两个类都申明成spring的bean,此刻便会产成矛盾。由于bean的名称便是bean的唯一标识,是不允许反复的。
- public class UserService {
- public void hello() {
- System.out.println("hello world");
- }
- }
- @Configuration
- @ComponentScan("com.example.demo.beam")
- public class JavaConfig {
- }
- public class Main {
- public static void main(String[] args) {
- AnnotationConfigApplicationContext context = new AnnotationConfigApplicationContext(JavaConfig.class);
- UserService teacherService = (UserService) context.getBean("userService");
- teacherService.hello();
- context.close();
- }
- }
在认证的情况下能够见到,获得bean的情况下键入的名称是userService。看結果
@Bean 注释申明的方式名是放进spring器皿的bean的name。
Java配备是根据@Configuration和@Bean来完成的。
@Configuration申明当今类是一个配备类,等同于一个Spring配备的xml文件。
@Bean注释在方式上,申明当今方式的传参为一个Bean。
实例认证:
- @Configuration
- @ComponentScan("com.example.demo.beam")
- public class JavaConfig {
- @Bean
- public UserService getStudentService() {
- UserService userService = new UserService();
- return userService;
- }
- }
这时的bean注释到方式上,依据上边的界定,这时的bean是回到种类UserService,因而回到的結果也是这。
- public class Main {
- public static void main(String[] args) {
- AnnotationConfigApplicationContext context = new AnnotationConfigApplicationContext(JavaConfig.class);
- UserService teacherService = (UserService) context.getBean("userService");
- teacherService.hello();
- context.close();
- }
- }
在Main接口测试下,大家仍然应用userService开展bean的获得和检测。

結果仍然这般。别的的方法待填补。


